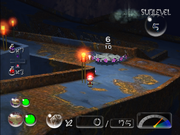
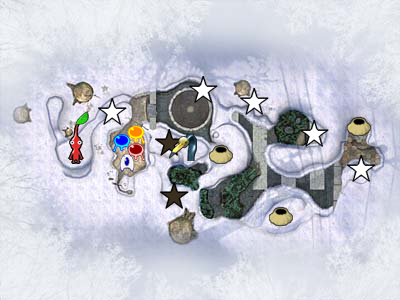
The Subterranean Complex is the second cave located in the Valley of Repose level.
You'll have to do many steps to get to it. First, you may have to kill the Dwarf Red Bulborb and Red Bulborb in the arena so they won't eat your Pikmin. You may have to destroy the rock formation in the water and then build a bridge on the other side. Use the Decorated Cannon Beetles to kill all of the enemies and then kill the Decorated Cannon Beetles by using their own rocks. If you didn't kill the Watery Blowhog, use your Blues or Purples to kill it. Then, use your Whites to tear down the gate and get rid of the poison pipes in it.
This giant dungeon starts out as a snow-covered cave like the Emergence Cave; however, as one gets deeper in the complex it becomes a rusty, mechanical area with bottomless pits, with a style similar to Rusty Gulch. Many of the enemies here have projectile and explosive attacks--be very careful when bringing Pikmin in, as explosions will kill them instantly.
There is ![]() x1480 (NTSC)/1310 (PAL) worth of treasure in the Subterranean Complex.
x1480 (NTSC)/1310 (PAL) worth of treasure in the Subterranean Complex.
The boss is the Man-at-Legs, an Arachnorb species armed with a laser-guided machine gun.
Treasures[]
- Nouveau Table (sub level 1)
- Exhausted Superstick (sub level 1)
- Spirit Flogger (sub level 2)
- Network Mainbrain (sub level 2)
- Superstrong Stabilizer (sub level 3)
- Omega Flywheel (sub level 3)
- Coiled Launcher (sub level 3)
- Mystical Disc (sub level 5)
- Adamantine Girdle (sub level 5)
- Repair Juggernaut (sub level 6)
- Vacuum Processor (sub level 6)
- Space Wave Receiver (sub level 6)
- Indomitable CPU (sub level 7)
- Furious Adhesive (sub level 7)
- Thirst Activator (NTSC)/Perfect Container (PAL) (sub level 7)
- Stellar Orb (sub level 9)
Enemies[]
- Anode Beetle
- Armored Cannon Beetle Larva
- Bumbling Snitchbug
- Careening Dirigibug
- Fiery Dweevil
- Gatling Groink
- Hairy Bulborb
- Munge Dweevil
- Snow Bulborb
- Swooping Snitchbug
- Volatile Dweevil
- Boss: Man-at-Legs
Music[]
- Cold Chasm
- Graphite Gulch
- Complex Cavern
- Rest Area
- Subterranean Complex
- Boss Battle
Strategy[]
Recommended Pikmin:
- 15-25 Red
- 15-25 Yellow
- 10-15 White
- 15-20 Purple
Sublevel 1[]
This level's hazard(s): Poison
The cave starts off with the first sublevel being a snowy cave appearance, much like the Frontier Cavern. However, this is the only sublevel in the cave to take on this appearance.
The player should start by destroying the poison pipes, and defeating some Bumbling Snitchbugs if they happen to be an annoyance. There are two treasures in this sublevel: the Nouveau Table, which should be buried, and the Exhausted Superstick. The Snow Bulborbs and Hairy Bulborbs can then be dealt with, preferably using Purple Pikmin.
Sublevel 2[]
This level's hazard(s): Explosions
The snow and poison have vanished here. Pikmin might fall off the course when thrown; as such, extra care should also be taken when attempting to activate the hole to the next sublevel.
The main focus on this level is on the various Bomb Rocks. The player should dismiss the Pikmin, and set off all bomb rocks he or she can find. The Careening Dirigibugs will be armed now, but this will not be as troublesome as the bomb rocks that were on the ground. The enemies should now be attacked one by one. Both spray types can help defeat the creatures very well here. The Swooping Snitchbugs here have a high tendency to throw Pikmin in the gaps that are between the larger expanses. This still doesn't make them as big as a threat as the Dirigibugs, but they still shouldn't be completely ignored. The treasures here are the Spirit Flogger and the Network Mainbrain.
Sublevel 3[]
This level's hazard(s): Fire
This level has three Armored Cannon Beetle Larvae, along with multiple fire geyser. When taking them down, make sure the beetles aren't facing the void, or else your Pikmin will be tossed into it. Once the threats are cleared, the Ivory Candypop Bud can be used to make White Pikmin if desired. Treasures here are the Superstrong Stabilizer, the Omega Flywheel, and the Coiled Launcher.
Sublevel 4[]
This level's hazard(s): None
This is a typical Rest Level. The only objects worth mentioning are eggs, Candypop Buds and a geyser, which can be used to get to the surface. There are three Ivory Candypops that can produce White Pikmin.
Sublevel 5[]
This level's hazard(s): Explosions

Here, it is advisable to dismiss the Pikmin into the corner behind the pod and to take a captain. The main objective now is to make all the Bomb Rocks and Volatile Dweevils that spawn from the ceiling fall. Every bomb that is in sight should be set off as well. Once everything is cleared, White Pikmin should be used to collect the Mystical Disc and the Adamantine Girdle. More Volatile Dweevils will fall when the Pikmin move along.
Sublevel 6[]
This level's hazard(s): Explosions, Fire, Poison, Electricity
Many enemies spawn close to each other in this level, and consist of Careening Dirigibugs, Dweevils and some Anode Beetles. The enemies spawn in different positions each time, and as such, not much advice can be given, but killing the creatures that are a little off from the groups first is usually a safe tactic. The Dweevils can also be chased near an edge, destroying the treasure they're carrying, if they are carrying any, and chances are they will walk off the side. You can also dispose of the Anode Beetles by carrying a couple of Pikmin with you to flip them over, and using cleverly lured Dirigibugs to drop bombs on them and kill them. Treasures available are the Repair Juggernaut, the Vacuum Processor and the Space Wave Receiver.
There is an exit geyser on this sublevel if the player needs to leave the cave, but there is also a rest stop two sublevels down at which can be used to replenish one's Pikmin army.
Sublevel 7[]
This level's hazard(s): Explosions
This level contains Gatling Groinks, a Careening Dirigibug, and Dweevils that drop when you pick up treasures. There is a strategy for the Groinks that is similar to that of the Ranging Bloyster. They are capable of shooting mortars from retractable cannons, giving them a far range of attack. Their metal shield makes it hard to attack them from the front. There are two here. One walking about, and the other on a pillar. The walking one should chase the active captain, so they can be defeated more easily with this tactic: The captains need to be separated. One of them should have all Pikmin, and the one without any should lure the creature over to the one with all Pikmin. When the captains are switched, the game should automatically move the idle captain away. The captain that is now active and has all Pikmin can attack the enemy from behind. Once defeated, the Groink needs to be carried back to the pod, as it can regenerate its life energy, making it necessary to defeat it again. This can also be bypassed when it is defeated while petrified. For the other one on the pillar, the tactic can be repeated. After these battles, the Indomitable CPU, the Furious Adhesive and the Thirst Activator need to be collected. One of the treasures may be in a corner. When this one is picked up, Bomb Rocks are likely to fall from the sky.
Another way to defeat the Gatling Groinks is to take a lone captain and run around behind them tapping A, easily jabbing them to low health, or luring them to the scattered Bomb Rocks; usually at least a few will be close enough to cause near-fatal damage in quick succession. Then you can either bring Pikmin to finish the job or finish it off yourself and send Pikmin in to carry it away. If you don't take the Groink to the ship, it will regain its health and recover.
A good way to get rid of the walking Gatling Groink is to lure it over a gap which causes it to fall and instantly die.
Sublevel 8[]
This level's hazard(s): None
Another rest level, and here there are two Queen Candypop Bud which can help make up for lost Pikmin. There are also three Violet Candypop Bud for Purple Pikmin, and a geyser to return to the surface. Also, there is a cool secret: if you keep resetting, the cave hole will appear touching a low wall, allowing you to move off the floor and fall into the pit. Make sure no Pikmin are following you; if correctly, you will reappear at the pod.
Sublevel 9 (Final level)[]
Looking around this level will reveal some metal switches and walls sticking out of the ground. There is an orb in the middle, which is the boss. However, it should not be attacked with normal Pikmin. Purples will inflict additional damage when they land on it while it is still dormant. The Man-at-Legs should have lost up to half of its health or more.
Note: This strategy is no longer possible in New Play Control! Pikmin 2, as the creature is invincible while it is getting up from its dormant state.
Once the enemy has stood up, it should start shooting at the Pikmin. Its red aiming laser will make it a bit easier to avoid. The player should now run away behind any barrier. The shots are low and can't go through the metal. Of course, this requires some distance, or else the Man-at-Legs could shoot over the obstacle. A good barrier is the long metal wall on the far side of the arena. One could also dismiss the Pikmin a distance away from the creature while it prepares to fire, then run tight circles around its legs, causing the Man-at-Legs to fire at Olimar and miss. This strategy is more effective if the player has already obtained the Rush Boots, as it will be easier to avoid the shots. The creature makes some short pauses from shooting sometimes, which won't last longer than one second, and then it starts firing again; the player needs to be sure to know when it's done completely. In this longer pause, it is possible to run in and attack. This process needs to be repeated until it is defeated. It is also possible to attack while the enemy is firing, but this is only advisable when all Pikmin can be thrown onto the creature before it continues to fire. When defeated, it will leave a lightbulb; its name is Stellar Orb, and it will light the area up. In every cave. It will get very helpful in large caves with patrolling enemies; a good example would be the eighth sublevel of the Cavern of Chaos.
Gallery[]
Main Article: Subterranean Complex/Gallery.
How to beat the boss
Note[]
This is also an excellent cave to get Purple Pikmin and White Pikmin. At least 22 of any Pikmin color other than White or Purple should be brought along into the cave. On the third sublevel there will be a lone Ivory Candypop Bud. Should it not be there, resetting the game and reloading the level should make it appear eventually. The next sublevel spawns three Ivory Candypops. On the eighth sublevel there will be three Violet Candypop Bud and two Queen Candypop Bud.
By using the Queen Candypops, the new Pikmin generated can be used for the Violet Candypops. The eggs scattered about the level will provide nectar for the leaf Pikmin. The cave can then be exited via the geyser. This process can be repeated infinitely, as the Buds are not limited to a certain number of uses total.
| Valley of Repose |
|---|
 Click on a location |
